Polaris Matte Orange Rust Xpedition ADV 5 NorthStar Accessories

Patyacht

Member
Jun 18, 2023
77
76
Lake Havasu City, AZ
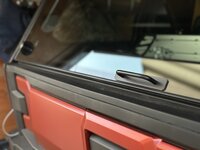
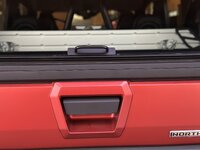
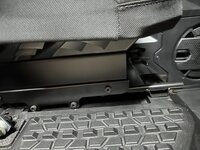
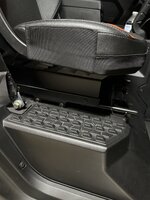
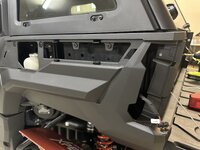
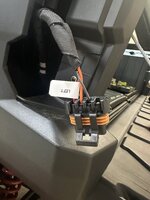
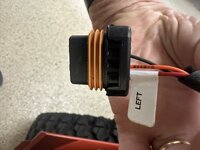
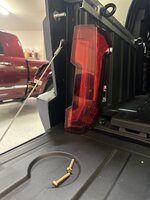
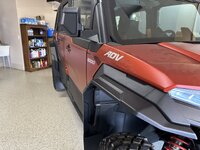
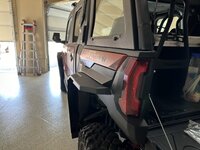
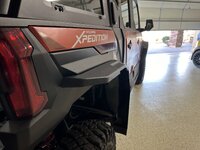
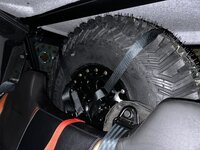
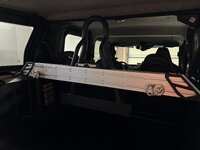
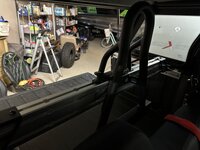
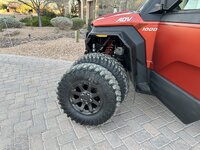
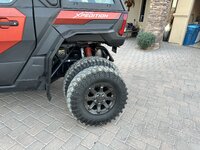
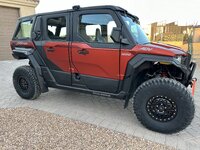
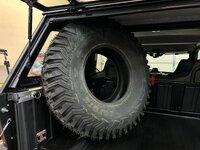
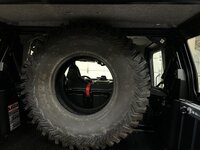
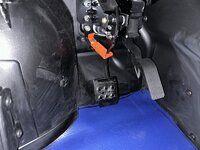
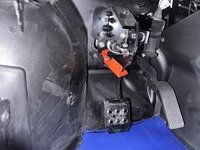
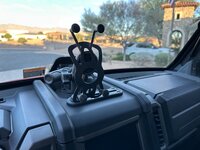
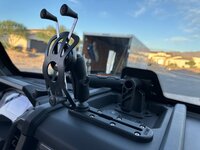
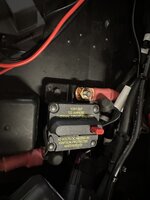
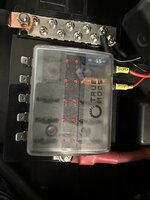
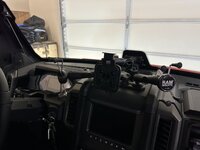
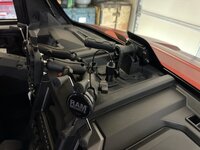
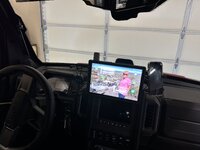
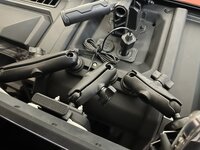
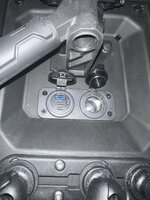
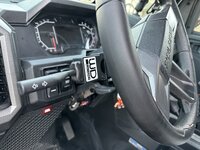
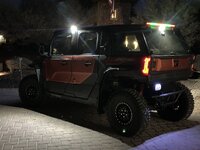
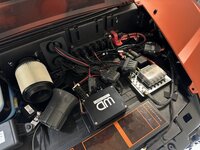
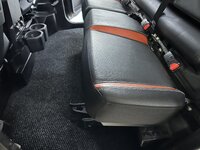
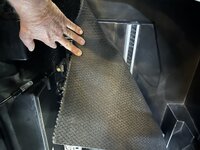
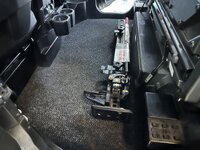
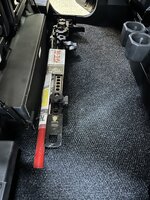
So, I've slowly but surely been adding accessories to our Polaris Xpedition ADV 5 NorthStar. At least what the wallet will bare right now. So far, all the accessories have come with easy-to-understand instructions. If it's a Polaris accessory, you'll have to download and print the instructions at your choosing. I'm going to post each of my accessories with pictures and links to where I got the accessory. Sorry for some of the terrible pictures. Feel free to chime in and post some of your accessories. If you have a better idea, Great!! It helps everyone. So, I'll start with the Rear Window Handle. Polaris considers the locking devices on the windows a handle also. They are hard to grab in bad weather or if you have small hands. My solution was this stick-on handle from Amazon. Amazon product ASIN B09TTKJXMV There are 1000's of handles so choose whatever you like.
 

Attachments

  • IMG_3919.JPEG
    IMG_3919.JPEG
    171.5 KB · Views: 381
  • IMG_3920.JPEG
    IMG_3920.JPEG
    197.3 KB · Views: 314
My next accessory was the stock rear bumper. IMHO Polaris should have included a bumper. Especially at the cost of these new machines. Looking at everything I wanted to do to our Xpedition I decided to stay stock. I thought it would allow me to mount flags etc. where the HD bumper would require drilling and more work and, of course, more $$$$! Here is a link to the bumper: Rear Bumper | Polaris XPEDITION
 

Attachments

  • IMG_3909.JPG
    IMG_3909.JPG
    312.3 KB · Views: 309
  • IMG_3922.JPG
    IMG_3922.JPG
    421.7 KB · Views: 327
My wife is barely 5' and I watched a video by another Xpedition owner and visibility was an issue. So, after a little searching I found some 2 1/4" seat risers. The installation was a snap about 15 minutes per seat max! I got mine from 802 Off Road: Online Store | 802 Off Road Again, the instructions were easy to understand and even comes with pictures. LOL Also no drilling. We love them. Visibility is improved so much. Still not a good as a Defender but way better than stock.
 

Attachments

  • IMG_3903.JPG
    IMG_3903.JPG
    398.8 KB · Views: 318
  • IMG_3904.JPG
    IMG_3904.JPG
    350.6 KB · Views: 318
When I went to the Sand Show in California this September, I bought a Chase Light from RLB Off Road. WOW, what a stand-up company. I worked with them since they did not have an Xpedition to check out the wiring to design the pigtail. Anyway, here is the end result. Getting to the taillights to hook up the wiring is super easy. Just remove 2 screws for the taillight and the side panel where the antifreeze bottle is located and you're there. We like Green thus this light has green and numerous other different flasher settings along with brake and turn signal lights. You can change settings just by pushing the switch. Here is the link to RLB Offroad: LED Chase Light Bar, Rearlightbar.com by Dezert-Tek Inc.
 

Attachments

  • IMG_3846.JPG
    IMG_3846.JPG
    200 KB · Views: 308
  • IMG_3847.JPG
    IMG_3847.JPG
    223.5 KB · Views: 307
  • IMG_3848.JPG
    IMG_3848.JPG
    238.8 KB · Views: 288
  • IMG_3849.JPG
    IMG_3849.JPG
    217.6 KB · Views: 283
  • IMG_3850.JPG
    IMG_3850.JPG
    213.7 KB · Views: 279
  • IMG_3921.JPG
    IMG_3921.JPG
    394.6 KB · Views: 282
  • IMG_3922.JPG
    IMG_3922.JPG
    421.7 KB · Views: 282
  • IMG_3932.JPG
    IMG_3932.JPG
    234.7 KB · Views: 268
  • IMG_3938.JPEG
    IMG_3938.JPEG
    184.8 KB · Views: 303
  • IMG_3935.MOV
    11.6 MB
Last edited:
Now I added the Full Coverage Fender Flares by Polaris. Here is the link. Full Coverage Fender Flares | Polaris XPEDITION The kit fits both the 2 seat and the 5 seat ADV. I did the install in about an hour. All the parts to include the push pins come in the kit. Super easy to install. The only area you need to watch is the rear installation. It is a 2 part install and you have to watch that the gap between the 2 pieces is as small as possible. You'll see what I mean when you place the 2 parts up to the vehicle before you do any drilling. I'd recommend everyone add this accessory especially if you go with bigger tires. Otherwise, you have a better chance of slinging a rock into a window or your windshield.
 

Attachments

  • IMG_3894.JPG
    IMG_3894.JPG
    352.1 KB · Views: 288
  • IMG_3895.JPG
    IMG_3895.JPG
    379.4 KB · Views: 277
  • IMG_3896.JPG
    IMG_3896.JPG
    292.3 KB · Views: 272
  • IMG_3897.JPG
    IMG_3897.JPG
    297.5 KB · Views: 284
Time for new tires and wheels. I wanted to go as big as I could and still store my spare in the vehicle without lying it down. So, after a lot of research, I determined the largest tire would be a 33" tire. I went with 33" ITP Coyotes which I ran on my Turbo S and loved them. I also wanted a 68" wide stance, so I went with System 3 SB6 beadlock wheels. I mounted the spare using the Polaris Crossbar with spare tire mount. I placed the spare tire just behind the back seat. It gives me about 1/4" roof clearance. But with the mounting straps that come with the spare tire mount, there is zero movement in the spare. NOTE: tires very in size and what the manufacture says is most always wrong IMHO!
The Coyote 33" usually measures small, i.e. not actually 33". More like 32"+. So do your own analysis. I've included some pictures of me working with a new Coyote 33" tire to see where it would fit. System 3 Link: WHEELS — System 3 2023 ITP Coyote Tires Link: Coyote - Designed for High Horsepower UTV and SxS
Crossbar Link: Lock & Ride MAX Cross Bed Bar | Polaris XPEDITION Spare Tire Mount: Lock & Ride MAX Spare Tire Carrier | Polaris XPEDITION I include 2 pictures of the stock 30" tires up against the 33's.
 

Attachments

  • IMG_3956.JPG
    IMG_3956.JPG
    274.7 KB · Views: 276
  • IMG_3955.JPG
    IMG_3955.JPG
    378.5 KB · Views: 266
  • IMG_3953.JPG
    IMG_3953.JPG
    389.2 KB · Views: 257
  • IMG_3908.JPG
    IMG_3908.JPG
    151.6 KB · Views: 250
  • IMG_3907.JPG
    IMG_3907.JPG
    226.8 KB · Views: 283
  • IMG_3931.JPG
    IMG_3931.JPG
    527.2 KB · Views: 291
  • IMG_3930.JPG
    IMG_3930.JPG
    499.6 KB · Views: 313
  • IMG_3929.JPG
    IMG_3929.JPG
    521.7 KB · Views: 278
  • IMG_3832.JPG
    IMG_3832.JPG
    317.7 KB · Views: 262
  • IMG_3831.JPG
    IMG_3831.JPG
    249.7 KB · Views: 268
One of the drawbacks of the Xpedition cockpit is the lack of storage space. In other side by sides, you can install door bags to get that storage space. Time will tell on how we get it in an Xpedition. So, Polaris came out with their RAM Mount for the Phone. I had it install as they said to, but I had a backing plate added to strengthen the mount. I'll eventually install the SDR Motorsports mount that they displayed at the Sand Show when it produced. In addition, I had a triple USB device (1 standard USB and 2 C ports) and a 12-volt socket installed to power the phones and the GPS. I put those Items on a switch so I could have power when the vehicle is shut down. Since both those devices came with in-line fuses, I had a fuse block and a 100amp Thermal Circuit Breaker installed. Nothing worse than something going wrong, and it's raining, and you have to find that damn fuse. No more, just look under the hood.
 

Attachments

  • IMG_3926.JPG
    IMG_3926.JPG
    228.5 KB · Views: 290
  • IMG_3928.JPG
    IMG_3928.JPG
    195.5 KB · Views: 270
  • IMG_3941.JPG
    IMG_3941.JPG
    178.9 KB · Views: 254
  • IMG_3942.JPG
    IMG_3942.JPG
    231.6 KB · Views: 302
  • IMG_3943.JPG
    IMG_3943.JPG
    189.4 KB · Views: 254
  • IMG_3944.JPG
    IMG_3944.JPG
    201.8 KB · Views: 265
  • IMG_3945.JPG
    IMG_3945.JPG
    226.2 KB · Views: 268
  • IMG_3946a.JPG
    IMG_3946a.JPG
    278.2 KB · Views: 274
  • IMG_3965.JPG
    IMG_3965.JPG
    336 KB · Views: 274
Last edited:
Since I'm in AZ and you can ride the streets, I had to install a street legal kit. I went with the WD Electronics kit. I didn't want to drill holes and I just liked the front turn signals. I had Just Money Motorsports do the install. They did this install, my wheels and tires and the mounting of my phone/GPS mount with the fuse block. I'm super pleased in their work and attention to detail. Here is a link to WD Electronics: Polaris Xpedition Turn Signal Kits Just Money Motorsports Link: Just Money Motorsports, LLC
 

Attachments

  • IMG_3927.JPG
    IMG_3927.JPG
    354.4 KB · Views: 273
  • IMG_3932.JPG
    IMG_3932.JPG
    234.7 KB · Views: 258
  • IMG_3933.JPG
    IMG_3933.JPG
    193.6 KB · Views: 258
  • IMG_3934.MOV
    11.2 MB
  • IMG_3939.JPG
    IMG_3939.JPG
    307.9 KB · Views: 269
  • IMG_3935.MOV
    11.6 MB
  • IMG_3940.JPG
    IMG_3940.JPG
    314.2 KB · Views: 312
Last edited:
My next accessory was the stock rear bumper. IMHO Polaris should have included a bumper. Especially at the cost of these new machines. Looking at everything I wanted to do to our Xpedition I decided to stay stock. I thought it would allow me to mount flags etc. where the HD bumper would require drilling and more work and, of course, more $$$$! Here is a link to the bumper: Rear Bumper | Polaris XPEDITION

Hey! have you got a close up of how you mounted the rear chase bar? Is it solid being hooked into the plastic roof? How did you route the wire. Where did you tap into brakes signal. Thanks
 
Hey! have you got a close up of how you mounted the rear chase bar? Is it solid being hooked into the plastic roof? How did you route the wire. Where did you tap into brakes signal. Thanks
Sorry no close up other than where the chase light ties into the taillights. (Left rear taillight). RLB makes a pigtail for that hook-up. LED Chase Light Bar, Rearlightbar.com by Dezert-Tek Inc. Just Money Motorsports did the install (928-706-3844). Call them.
 
Ok, 3 more accessories I've done. 1st, I added the Lock and Ride Max Rear Floor Rail Kit, Polaris Part Number: 2889623. Then I purchased the Polaris 36" High-Lifting Jack, Polaris Part Number: 2889508. So the problem then was where to store the jack. I decided to secure it under the back seat using 1 of the Max Rails. It fits like a glove. Out of everyone's way until you need it. Finally, I finished off the interior by purchasing the carpet kit offered by Carl's Cycle Sales in Boise, Idaho Home Carl's Cycle Sales Boise, ID (208) 853-5550 I had to do a little cutting of the carpet for the back seat floor to get the carpet to fit around the Jack mounts securing the Jack to the Max Rear Floor Rail. Note: If you do have some of the rails in your Xpedition, one of the vehicle designers recommended for me to get the Rail Cover Kit, Polaris Part Number: 2890708. I totally agree. Helps keep the dirt out of the rails so things slide easier etc..
 

Attachments

  • IMG_4227.JPG
    IMG_4227.JPG
    342.9 KB · Views: 255
  • IMG_4220.JPG
    IMG_4220.JPG
    400.6 KB · Views: 249
  • IMG_4219.JPG
    IMG_4219.JPG
    375.7 KB · Views: 250
  • IMG_4218.JPG
    IMG_4218.JPG
    336.4 KB · Views: 255
  • IMG_4217.JPG
    IMG_4217.JPG
    425.6 KB · Views: 254
  • IMG_4216.JPG
    IMG_4216.JPG
    529.1 KB · Views: 252
  • IMG_4228.JPG
    IMG_4228.JPG
    420.8 KB · Views: 270
The carpet you installed looks great! Have you noticed any sound reduction inside the cab after you installed it? I'm hoping that would be an ancillary benefit to an otherwise really good-looking carpet kit.
 
Ok, 3 more accessories I've done. 1st, I added the Lock and Ride Max Rear Floor Rail Kit, Polaris Part Number: 2889623. Then I purchased the Polaris 36" High-Lifting Jack, Polaris Part Number: 2889508. So the problem then was where to store the jack. I decided to secure it under the back seat using 1 of the Max Rails. It fits like a glove. Out of everyone's way until you need it. Finally, I finished off the interior by purchasing the carpet kit offered by Carl's Cycle Sales in Boise, Idaho Home Carl's Cycle Sales Boise, ID (208) 853-5550 I had to do a little cutting of the carpet for the back seat floor to get the carpet to fit around the Jack mounts securing the Jack to the Max Rear Floor Rail. Note: If you do have some of the rails in your Xpedition, one of the vehicle designers recommended for me to get the Rail Cover Kit, Polaris Part Number: 2890708. I totally agree. Helps keep the dirt out of the rails so things slide easier etc..
I’m liking your backup light. I hadn’t seen that done before. Do you get any glare on your windows from it?
 
No back-up light installed. Besides tail lights and my license plate light, I only have Scene Lights, and a Chase Light Bar by RLB facing the rear. I really haven't ridden at night to know if there is a glare.
 
Back
Top